Sunday, January 29, 2012

In Honor of National Pie Day: "Pocket-Pies"

     This past Monday was National Pie Day.  Yes, there is an official day for pies.  Who knew?  For anyone interested, you can get more information at the American Pie Council's website here.  Did you know there was an American Pie Council? Me either....

     Anyone who knows me well, knows I love pie.  In fact it is a religion in my family.  So when I realized there was an actual day in honor of this tasty treat, I thought I must make a pie, even if I was a week late.  You may be wondering what this has to do with decorating.  Well decorating can come in all forms, including dessert!  It is all about the presentation. 

     So, I thought I would share with you my fun little gadget from Williams-Sonoma that makes mini pies.  This takes pie making to the next level.

     It's called the "Pocket-Pie Mold" and they come in several different shapes.  I think right now they are selling the apple pie shape but they switch the styles often.  Don't these look delicious?  Of course Williams-Sonoma's pies are absolutely perfect!

Apple Pocket Pie Mold
     I have a heart shape mold and thought it would be a great time to use it with Valentine's Day on the horizon. 


     First, you will need to make your own pie crust.  If you are short on time you can purchase pre-made pie crusts from the grocery store.  Although, I must say homemade crust is soooooo much better!


    I decided to make strawberry pies because the filling is pretty simple.  You can easily substitute any fruit pie filling you enjoy. 

     The directions on how to make the pies are on the back of the "Pocket-Pie Mold" box and very self explanatory.  The basic idea is as follows: you will use the mold to make cut outs in your dough.; then place the solid cut out in one side of the pocket pie; place one or two tablespoons of your fruit filling in the pie crust; brush your edges with egg wash;  then lay the cutout with the small heart cut out on top; last, bring the other side of the pocket pie over and press to seal you pie.


    Place these little pretties on a cookie sheet and sprinkle with sugar.  Bake them in a 400 degree oven for 15-20 minutes or until golden brown. 

     Yummmmmmm.............


     Obviously, my pies are not as perfect as the ones displayed in the Williams-Sonoma photo above, but I think they still look pretty yummy. 

     These pies would make great gifts. Just pop each one in a cellophane bag, add some cute ribbon, and you got a tasty homemade Valentine! 

     So in honor of National Pie Day, I challenge you to tackle a pie recipe.  Find a fun gadget like the "Pocket-Pie Mold" to add that extra special touch.  Happy pie making!!!! 

                                                                                                                     -Molly

Sunday, January 22, 2012

Lamp Shade Makeover

     I hope all my fellow Marylanders stayed warm during our first snow of the season!  Despite the weather I had a pretty busy weekend, and unfortunately very little time for decorating.  Booo!!!!  With time being an issue, I decided a quick project was in order. 

     If you are like me, you probably have some items in your home that you would like to re-purpose for another room.  In my case, I wanted to re-purpose a lamp that I had in my foyer.  I always liked this lamp, but it was a tad too small for the table it was sitting on.  Basically, it needed a new home and I had just the place for it.

     Here is the lamp before I got my hands on her....


     As you can see, the lamp shade is a bit BLAH!  But I figured with a little ribbon, some decorative accents, and my handy glue gun I could transform this boring baby into something more interesting!        .

     Here is what I came up with....


     Now that's more like it.  Can you guess what room this little lady is going in?

     I think the best part is when the lamp is lit; the butterflies actually glow! 


     This was definitely a quick and easy project.  Once I got started it took all of thirty minutes.  I hope this inspires you to re-purpose an item in your home and give it new life. 

     Happy Decorating and until next time.....

                                                                                                   Molly

Sunday, January 15, 2012

Baby's Room: Progress Update

      I hope all of you are enjoying the three day weekend.  With the extra time, my husband and I decided to take on the baby's room with a vengeance. Not to mention, we got word that our furniture arrived two months ahead of schedule! Ummmmm...time to get moving. 

    Here is what the room looked like before....


     The first thing we needed to do was paint.  I wanted a light spring green for the walls so we went with Behr's "Palm Breeze."
    
     Here is what the walls looked like after the paint went up....


     Now, I like the color...but a little of this green goes a looooong way.  To break it up a bit and to add some charm to the room, I wanted to add beadboard.  There are a couple of ways to tackle a project like this.

     For those decorators out there that insist on authenticity, your best bet is to buy 4' x 8' sheets of beadboard from your local home improvement store.  Hopefully, you also have a crow bar handy to pry off your baseboards. You will also need a table saw to cut the sheets of beadboard, and a kick-a** workshop to make the magic happen.  Now my husband is very handy, but we don't exactly have that sort of set up in our home.  :)

     Sooooo, we resorted to the next best thing......beadboard wallpaper!  Now, some of you may hate the idea of wallpaper. I have to say, I have never really been much of a fan of it myself.  But let me tell you, this is no 70's style, old school, wallpaper.  This stuff is awesome and you can buy your rolls online.  Woohoooo!!!  The directions are included with the rolls and are very straight forward. The best part is that the paper is textured to resemble the panels in real beadboard.   AWESOME!!!!


     Before you dive in, first make sure you draw plumb lines on every wall so that you can ensure the lines on the wallpaper are straight and level.  Draw vertical lines just like the ones below with a level.....


    Next, you need to measure and cut your strips of paper.  Then submerge the papers, one by one, in water for 30 seconds to activate the glue on the back of the wallpaper.  We used our bathtub vs. a bucket of water, which we found much easier to maneuver and less messy. 

     After 30 seconds in water, remove your paper and lay it flat, glue side up, for five minutes so that the glue becomes a little sticky.  Just like this.....


     After 5 minutes, it is time to apply the paper to your wall.  Use your plumb line as the guide for the first piece and then line each additional sheet of paper off the first piece.  This will ensure straight, pretty, lines.  

     Then run a sponge over the paper a few times to ensure no air bubbles are trapped between your wall and the paper. 

     Just like this.....


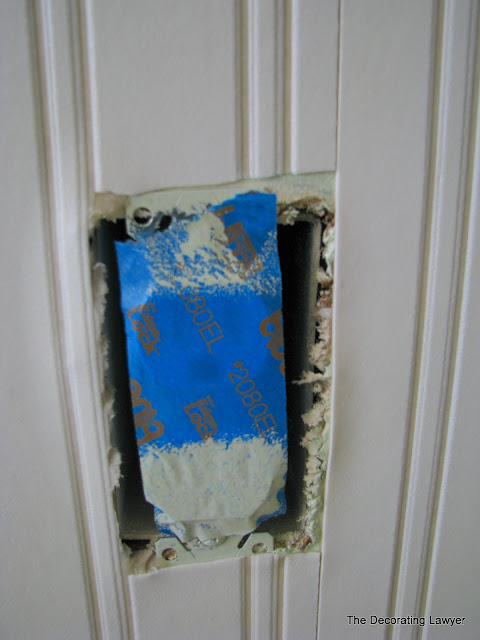
     We chose to cut around the wall sockets once the paper was up and still wet. We found that an exacto knife did the trick nicely.  Remember, it doesn't have to be perfect because the plate will cover any frayed edges.


     You can see in the photo above, the seam where the two pieces of the wallpaper met.  We figure you can easily remedy this with a little caulk and a final coat of white paint. Honestly, when you stand away from the wall you don't notice the seams all that much. 

     And that is how you apply beadboard wallpaper!

     Some final tips for those that want to tackle a project like this.  Make sure your walls are already primed.  Painted walls (avoid semi-gloss or gloss) help the paper adhere to the wall better.  That being said, the paper takes a good 30 minutes to dry.  So if you find that your first application of the paper didn't go as planned, you can always peel it off and re-apply. 

     Since the bedroom was rather large, we found working as a two person team helpful.  However, this could be a one person project for a smaller space like a bathroom or kitchen.  In fact, it would look great in a bathroom!!!! As I write this, I am thinking of where else in my house I could use the leftover paper and I think my half-bath is calling!
     Now, this project is by no means complete.  The next steps: install chair railing, caulk the seams, and add one coat of white paint.  Stay tuned for the final reveal in the coming weeks!

Sunday, January 8, 2012

Decorating Bookshelves

     Hello everyone.  I hope your New Year is starting off on the right foot. Today I thought I would share with you my built-ins, which surround our TV in the living room.  We were in our house for over a year before we decided to take the plunge and hire someone to build a custom entertainment unit.  We toiled with the idea of just buying a pre-made unit, but were unable to find one that utilized the entire space without busting our budget.  We lucked out when we met Jean Paul! He is, by all means, a true craftsman and has made a business out of designing custom built-ins.  We think he executed our vision beautifully.  Plus it added some much needed storage space to boot! Woohooo!

     Here is a view of his final product....


     Now for the fun part...Decorating!!!! Our living and dining room flow into one another so I kept the same color palette for them both.  I have to admit, when it comes to decorating my own home I tend to be a bit color phobic.  Not to say I don't appreciate color in other homes, because I do.  I just tend to find that neutral colors bring me peace.....ohmmmmmm (recite your favorite yoga mantra here!).  The colors I chose for this space are brown, tan, cream and green. 

     Here are a few items I picked up at some of my favorite stores (a.k.a. "The Usual Suspects"): Home Goods, Michael's and Target.

   A little pottery....


Artwork is always key....


A few wooden and straw balls always add some much needed texture to any space.....


And what space is complete without baskets....LOVE THEM!!!!!


     Now, when I decorate I tend to arrange, rearrange, and rearrange again before I think the space is just right. Let's just say it is a process. 

     Here is what I came up with.......


So just in case you forgot what the BEFORE photo looked like, here it is one more time.....


And here is the AFTER.....


Let me know what you all think! Until next time........


                                                               -Molly

Sunday, January 1, 2012

2012 To-Do List


HAPPY NEW YEAR!!!!
     I hope everyone had a wonderful holiday season. I know we really enjoyed spending time with family and friends, and we are looking forward to what 2012 has in store for us.  Most people create a New Year's Resolution List, but with our first baby on the way, I created a To-Do list instead.
MY TO-DO LIST

     #1.     Baby's Room:  In the coming weeks, I will share with you the transformation of my former guest bedroom into a cozy nursery. 

      Here is a sneek peek at my color inspirations for the room....

 
     #2.     Guest Bathroom:  I have been dying to paint and add a few decorative touches to transform our builder grade, ho-hum, bathroom into a more stylish, spa retreat. 

     Here is a view of the bathroom today....

     It is a pretty basic bathroom so it will be fun to add some paint and accesories to really make it stand out. 

     I am inspired by the colors I found here.....


     #3.     Parents' 1994 Master Bathroom:  As a Christmas present to my parents I am redoing their bathroom for them.  I am inspired by Centsational Girl's fabulous remodel of a friend's bathroom.  You can check it out here http://www.centsationalgirl.com/2011/01/budget-bathroom-makeover-linky/.
    
     This list is a probably a little ambitious considering I have a job and I am pregnant!  Crazy...I know.  I tend to bite off more than I can chew.  Lucky for me, my husband agreed to help with the manual labor.  :)  I hope you join me for the ride and see whether I can pull this off! 

Until next time....
                                                                                                             - Molly