Here is what the room looked like before....
The first thing we needed to do was paint. I wanted a light spring green for the walls so we went with Behr's "Palm Breeze."
Here is what the walls looked like after the paint went up....
Now, I like the color...but a little of this green goes a looooong way. To break it up a bit and to add some charm to the room, I wanted to add beadboard. There are a couple of ways to tackle a project like this.
For those decorators out there that insist on authenticity, your best bet is to buy 4' x 8' sheets of beadboard from your local home improvement store. Hopefully, you also have a crow bar handy to pry off your baseboards. You will also need a table saw to cut the sheets of beadboard, and a kick-a** workshop to make the magic happen. Now my husband is very handy, but we don't exactly have that sort of set up in our home. :)
Sooooo, we resorted to the next best thing......beadboard wallpaper! Now, some of you may hate the idea of wallpaper. I have to say, I have never really been much of a fan of it myself. But let me tell you, this is no 70's style, old school, wallpaper. This stuff is awesome and you can buy your rolls online. Woohoooo!!! The directions are included with the rolls and are very straight forward. The best part is that the paper is textured to resemble the panels in real beadboard. AWESOME!!!!
Before you dive in, first make sure you draw plumb lines on every wall so that you can ensure the lines on the wallpaper are straight and level. Draw vertical lines just like the ones below with a level.....
Next, you need to measure and cut your strips of paper. Then submerge the papers, one by one, in water for 30 seconds to activate the glue on the back of the wallpaper. We used our bathtub vs. a bucket of water, which we found much easier to maneuver and less messy.
After 30 seconds in water, remove your paper and lay it flat, glue side up, for five minutes so that the glue becomes a little sticky. Just like this.....
After 5 minutes, it is time to apply the paper to your wall. Use your plumb line as the guide for the first piece and then line each additional sheet of paper off the first piece. This will ensure straight, pretty, lines.
Then run a sponge over the paper a few times to ensure no air bubbles are trapped between your wall and the paper.
Just like this.....
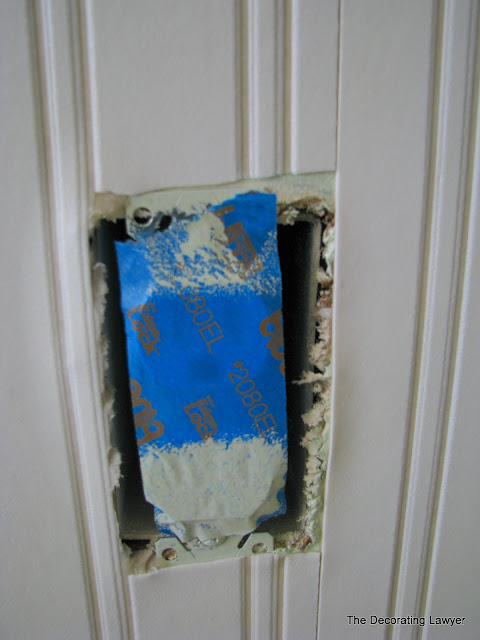
We chose to cut around the wall sockets once the paper was up and still wet. We found that an exacto knife did the trick nicely. Remember, it doesn't have to be perfect because the plate will cover any frayed edges.
You can see in the photo above, the seam where the two pieces of the wallpaper met. We figure you can easily remedy this with a little caulk and a final coat of white paint. Honestly, when you stand away from the wall you don't notice the seams all that much.
And that is how you apply beadboard wallpaper!
Some final tips for those that want to tackle a project like this. Make sure your walls are already primed. Painted walls (avoid semi-gloss or gloss) help the paper adhere to the wall better. That being said, the paper takes a good 30 minutes to dry. So if you find that your first application of the paper didn't go as planned, you can always peel it off and re-apply.
Since the bedroom was rather large, we found working as a two person team helpful. However, this could be a one person project for a smaller space like a bathroom or kitchen. In fact, it would look great in a bathroom!!!! As I write this, I am thinking of where else in my house I could use the leftover paper and I think my half-bath is calling!
Now, this project is by no means complete. The next steps: install chair railing, caulk the seams, and add one coat of white paint. Stay tuned for the final reveal in the coming weeks!


No comments:
Post a Comment